How to Consume REST API in Angular 15
With Angular, all utility to consume REST API is ready to use

Hi guys,
Today we will learn about the angular framework and for specific version is version 15. Currently, the demand for angular is increasing time by time, supported by the google team and always updating every six months (if I’m not wrong). In this section, we will focus on how to consume API in angular, services angular, interface, generate with angular cli, reactive forms, bootstrap 5, and many things.
So, if you are still curious about angular just visit the website here
Let’s get started creating project angular.
Pre Installation
I assume that you have installed nodejs and npm, in this tutorial I’m using nodejs version 16.18.1 and npm 8.19.2. But, if you still have not yet installed it, just install it for now.
Installation
We need to install angular cli. Simply, just run this command.
npm i @angular/cli@15.1.16Init Project
After that, the next step is to init project, just run this command
ng new angular-tutorial-consume-api
Just type y for angular routing, because in the next step we will create a new module. For styling, we are using SCSS and just waiting for the moment.
After initiation is completed, just try to run this command.
npm run start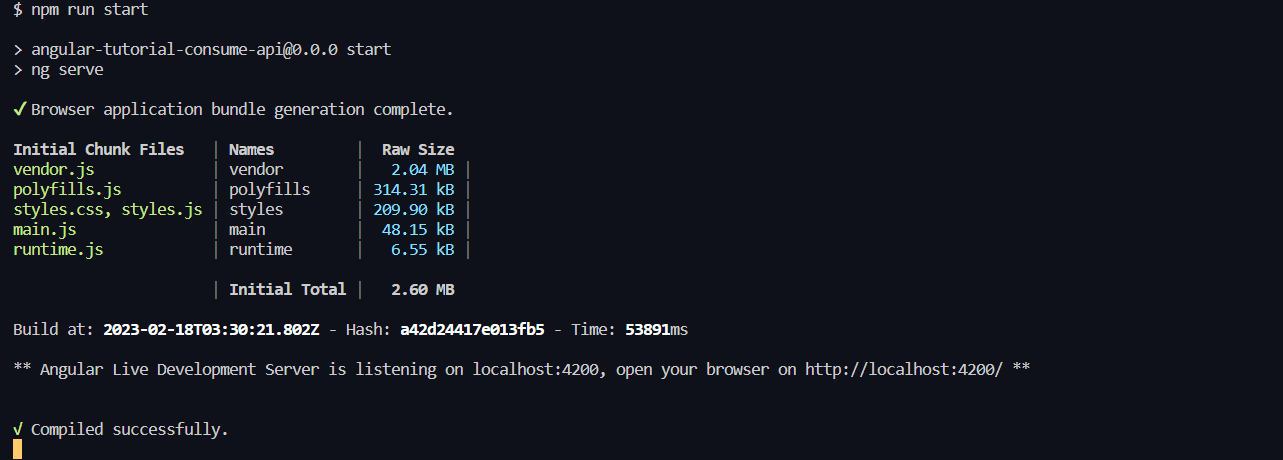
The preview init project like this

In this tutorial, I want to use API from the link tutorial below, so if you want to try to learn how to create API with NestJS and postgreSQL, just read the article below.
Create Feature
The next step is to create a module todolist, we can use cli angular to generate module, service, component, pipe and etc.
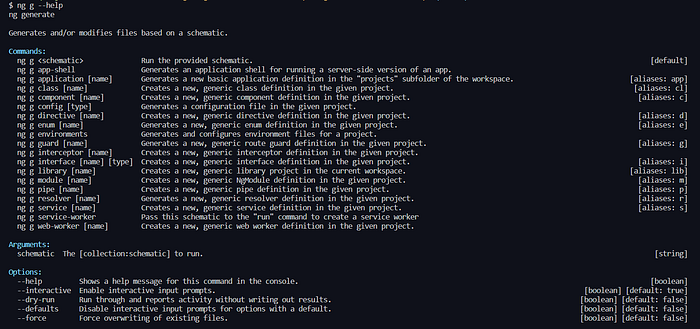
To generate many things we can use in one line like this.
ng generate module todolist && ng generate service todolist/service/todolist && ng g interface todolist/interface/todolist
Oh ya, Don’t forget to generate component todolist
ng generate component todolist/todolistConfiguration Routing
Open app-routing.module.ts and modify the routing.
import { NgModule } from '@angular/core';
import { RouterModule, Routes } from '@angular/router';
import { TodolistComponent } from './todolist/todolist/todolist.component';

const routes: Routes = [
  {
   title: 'Home',
   path: '',
   component: TodolistComponent
  }
];

@NgModule({
  imports: [RouterModule.forRoot(routes)],
  exports: [RouterModule]
})
export class AppRoutingModule { }
Then, add TodolistModule on app.module.ts
import { NgModule } from '@angular/core';
import { BrowserModule } from '@angular/platform-browser';
import { HttpClientModule } from '@angular/common/http';
import { AppRoutingModule } from './app-routing.module';
import { AppComponent } from './app.component';
import { TodolistModule } from './todolist/todolist.module';
import { FormsModule, ReactiveFormsModule } from '@angular/forms';

@NgModule({
  declarations: [
    AppComponent
  ],
  imports: [
    BrowserModule,
    AppRoutingModule,
    HttpClientModule,
    FormsModule,
    ReactiveFormsModule,
    TodolistModule
  ],
  providers: [],
  bootstrap: [AppComponent]
})
export class AppModule { }
Don’t foget to update app-component.html
<router-outlet></router-outlet>The function router-outlet is to render component depending on app-routing.module.ts
To use HttpMethod like get, post, update and delete, we need to import HttpClientModule from @angular/common/http , FormsModule, and ReactiveFormsModule to use a reactive form from @angular/forms
import { NgModule } from '@angular/core';
import { BrowserModule } from '@angular/platform-browser';
import { HttpClientModule } from '@angular/common/http';
import { AppRoutingModule } from './app-routing.module';
import { AppComponent } from './app.component';
import { TodolistModule } from './todolist/todolist.module';
import { ReactiveFormsModule } from '@angular/forms';
import { FormsModule } from '@angular/forms';

@NgModule({
  declarations: [
    AppComponent
  ],
  imports: [
    BrowserModule,
    AppRoutingModule,
    HttpClientModule,
    ReactiveFormsModule,
    FormsModule,
    TodolistModule
  ],
  providers: [],
  bootstrap: [AppComponent]
})
export class AppModule { }
Interface
Before going to section services, just completed the interface todolist. Open file todolist.interface.ts
export interface Todolist {
    id?: number;
    title: string;
    description: string;
    status: string;
    due_date: number;
    createdAt?: Date;
    updatedAt?: Date;
}
Configuration Service
In angular, we’re using a service to declare list of endpoints and or maybe for functions. Open todolist.service.ts
import { HttpClient } from '@angular/common/http';
import { Injectable, Type } from '@angular/core';
import { Observable } from 'rxjs';
import { ITodolist } from '../interface/todolist';

@Injectable({
  providedIn: 'root'
})
export class TodolistService {
  private readonly API_URL = 'http://localhost:3000/todolist';
  constructor(
    private readonly httpClient: HttpClient
  ) { }

  getAllTodolist(): Observable<ITodolist[]> {
    return this.httpClient.get<ITodolist[]>(this.API_URL);
  }

  getTodolistById(id: number): Observable<ITodolist> {
    return this.httpClient.get<ITodolist>(this.API_URL + `?${id}`);
  }

  createTodolist(body: ITodolist): Observable<ITodolist> {
    return this.httpClient.post<ITodolist>(this.API_URL, body);
  }

  updateTodolist(id: number, body: ITodolist): Observable<ITodolist> {
    return this.httpClient.put<ITodolist>(this.API_URL + `/${id}`, body);
  }

  deleteTodolist(id: number): Observable<Object> {
    return this.httpClient.delete<Object>(this.API_URL + `/${id}`);
  }


}- We need to inject instance HttpClient to function HttpMethod
- Observable is the data type to stream the data.
In angular, Usually we are using reactive javascript or rxjs to manage or manipulate data. I suggest you to read more information about rxjs in link below.
Testing Todolist Service
We need to make sure that the todolist service is not an error. So, just try on the todolist.component.ts
Please make sure that the services backend was running well
import { AsyncPipe } from '@angular/common';
import { Component, OnInit } from '@angular/core';
import { ITodolist } from '../interface/todolist';
import { TodolistService } from '../service/todolist.service';
@Component({
selector: 'app-todolist',
templateUrl: './todolist.component.html',
styleUrls: ['./todolist.component.scss']
})
export class TodolistComponent implements OnInit {
constructor(private readonly todolistService: TodolistService) {}
ngOnInit(): void {
this.todolistService.getAllTodolist().subscribe((response: ITodolist[]) => {
console.log(response, 'res');
})
}
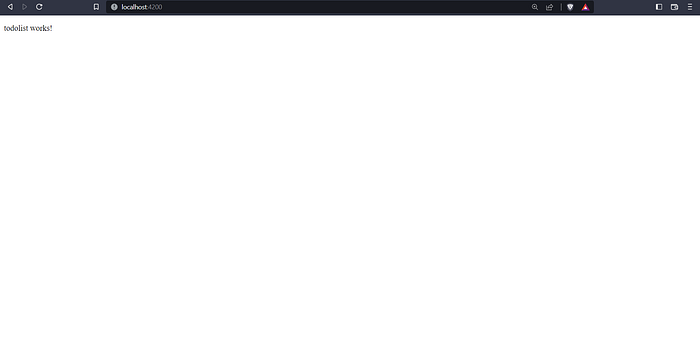
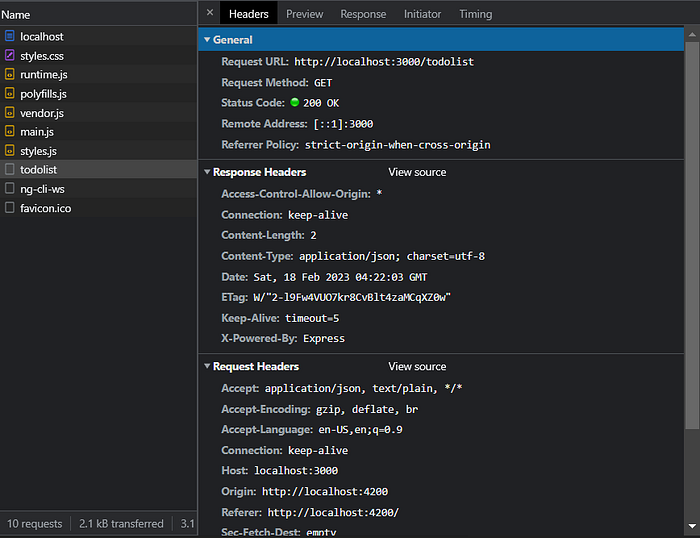
}After that, check the application on the browser.
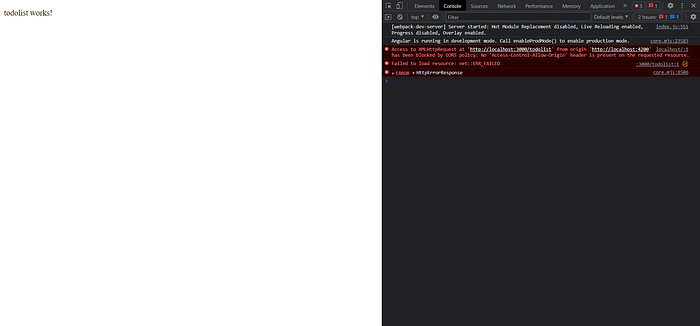
If you got an error like the image above, don’t panic, that error is because the backend does not configure CORS. The backend URL is localhost:3000 and frontend localhost:4200, this is the problem because the origin is different. To solve this problem just allow the cors on the backend.
After the backend allows CORS, the response will be like this.
Create User Interface
In this tutorial, I want to use ngx-bootstrap, so just install the library with run this command.
npm i ngx-bootstrap@10.2.0 bootstrapThe version ngx-bootstrap 10.2.0 is using bootstrap 5, So the styling is a little different from previous version. Also, I need fontawesome
npm install @fortawesome/fontawesome-svg-core &&
@fortawesome/free-solid-svg-icons &&
@fortawesome/angular-fontawesome
First of all, we need to update app.module.ts
import { NgModule } from '@angular/core';
import { BrowserModule } from '@angular/platform-browser';
import { HttpClientModule } from '@angular/common/http';
import { AppRoutingModule } from './app-routing.module';
import { AppComponent } from './app.component';
import { TodolistModule } from './todolist/todolist.module';
import { FormsModule, ReactiveFormsModule } from '@angular/forms';
import { ModalModule } from 'ngx-bootstrap/modal';

@NgModule({
  declarations: [
    AppComponent
  ],
  imports: [
    BrowserModule,
    AppRoutingModule,
    HttpClientModule,
    FormsModule,
    ReactiveFormsModule,
    TodolistModule,
    ModalModule.forRoot()
  ],
  providers: [],
  bootstrap: [AppComponent]
})
export class AppModule { }- From ngx-bootstrap I just import the module modal.
Also in angular.json add these styles.
"styles": [
              "src/styles.scss",
              "node_modules/bootstrap/dist/css/bootstrap.min.css",
           ],
Then, update todolist.module.ts
import { NgModule } from '@angular/core';
import { CommonModule } from '@angular/common';
import { TodolistComponent } from './todolist/todolist.component';
import { FontAwesomeModule } from '@fortawesome/angular-fontawesome';


@NgModule({
  declarations: [
    TodolistComponent
  ],
  imports: [
    CommonModule,
    FontAwesomeModule,
  ]
})
export class TodolistModule { }- We are using fontawesome module to use fontawesome icons.
After that, update file todolist.component.html
<div class="mobile">
    <div class="row">
        <div class="col-lg-12">
            <h3 class="text-center fw-bold mb-3">
                My Todolist
            </h3>
        </div>
    </div>
    <button type="button" class="btn btn-primary" (click)="createTodo()" style="cursor: pointer">Add Todo</button>
    <div class="row my-3">
        <div class="col-lg-12">
            <div class="input-group">
                <input type="text" class="form-control" placeholder="Search" aria-label="Search" aria-describedby="search-todolist" #searchInput (keyup)="search(searchInput.value)">
              </div>
        </div>
    </div>
    <div class="row">
        <div class="col-lg-12">
            <ul class="list-group">
                <ng-container *ngFor="let item of todolist$ | async; let i = index;">
                    <li class="list-group-item d-flex gap-3 todolist" >
                        <div class="fw-semibold w-100" (click)="detailTodo(item)">
                            <span class="pe-1">{{i + 1}}. {{item.title}}</span>
                            <ng-container [ngSwitch]="item.status">
                                <span *ngSwitchCase="'progress'" class="badge bg-danger">Progress</span>
                                <span *ngSwitchCase="'completed'" class="badge bg-primary">Completed</span>
                                <span *ngSwitchDefault class="badge bg-warning">Todo</span>
                            </ng-container>
                        </div>
                        <div class="d-flex gap-2">
                            <fa-icon [icon]="faPencil" class="text-success" style="cursor: pointer" (click)="updateTodo(item)"></fa-icon>
                            <fa-icon [icon]="faTrash" class="text-danger" style="cursor: pointer" (click)="deleteTodo(item)"></fa-icon>
                        </div>
                    </li>
                </ng-container>
              </ul>
        </div>
    </div>
</div>- We are using pipe async to read data observable and automatically unsubscribe data when leaving the page.
- Using ng switch case to check conditional rendering status todo
Then, update todolist.component.scss
.mobile {
    max-width: 576px !important;
    margin: 0 auto;
    padding: 16px;

    .todolist {
        &:hover {
            background-color: rgb(206, 206, 206);
            animation-name: animateChangeBg;
            animation-duration: 1s;
        }
    }
}

@keyframes animateChangeBg {
    from {background-color: rgb(255, 255, 255);}
    to {background-color: rgb(206, 206, 206);}
}- The style above is to make the first mobile-on-desktop views.
- Of course, we added some animation
Then, update todolist.component.ts
import { AsyncPipe } from '@angular/common';
import { Component, OnInit } from '@angular/core';
import { FormControl } from '@angular/forms';
import { BsModalRef, BsModalService } from 'ngx-bootstrap/modal';
import { delay, filter, map, Observable } from 'rxjs';
import { ITodolist } from '../interface/todolist';
import { TodolistService } from '../service/todolist.service';
import { faTrash, faPencil } from '@fortawesome/free-solid-svg-icons';
import { DeleteTodolistComponent } from './delete-todolist/delete-todolist.component';
import { FormTodolistComponent } from './form-todolist/form-todolist.component';
import { DetailTodolistComponent } from './detail-todolist/detail-todolist.component';

@Component({
  selector: 'app-todolist',
  templateUrl: './todolist.component.html',
  styleUrls: ['./todolist.component.scss']
})
export class TodolistComponent implements OnInit {
  todolist$?: Observable<ITodolist[]>;
  searchTodolist = new FormControl();
  modalRef?: BsModalRef;
  faTrash = faTrash;
  faPencil = faPencil;
  constructor(private readonly todolistService: TodolistService, private modalService: BsModalService) {}

  ngOnInit(): void {
      this.getTodolist();
  }

  getTodolist() {
    this.todolist$ = this.todolistService.getAllTodolist();
  }

  search(searchTodolist: string): void {
    this.todolist$ = this.todolistService.getAllTodolist().pipe(
      delay(500),
      map((todolist: ITodolist[]) => {
        const filterData = todolist.filter((item) => {
          const checkKeyword = new RegExp(`${searchTodolist}`, 'ig')
          if (!item.title.match(checkKeyword)) {
            return;
          }
          return {...item}
        })
        return filterData;
      }),
    )
  }

  createTodo(): void {
    this.modalRef = this.modalService.show(FormTodolistComponent, {
      initialState: {
        data: undefined
      },
      animated: true,
    });
    this.modalRef.content.onClose.subscribe((response: boolean) => {
      if (response) {
        this.getTodolist();
      }
    })
    console.log('create');

  }

  updateTodo($event: ITodolist): void {
    this.modalRef = this.modalService.show(FormTodolistComponent, {
      initialState: {
        data: $event
      },
      animated: true,
    });
    this.modalRef.content.onClose.subscribe((response: boolean) => {
      if (response) {
        this.getTodolist();
      }
    })
    console.log('update');
  }

  deleteTodo($event: ITodolist): void {
    this.modalRef = this.modalService.show(DeleteTodolistComponent, {
      initialState: {
        data: $event
      },
      animated: true,
    });
    this.modalRef.content.onClose.subscribe((response: boolean) => {
      if (response) {
        this.getTodolist();
      }
    })
    console.log('delete');
  }

  detailTodo($event: ITodolist): void {
    this.modalRef = this.modalService.show(DetailTodolistComponent, {
      initialState: {
        data: $event
      },
      animated: true,
    });
  }

}- We need to inject service todolist on the component todolist to be able to use function hit endpoint like get all, get one and etc.
- We declare variable todolist$ with type observable to assign function getAll from service todolist.
- Function search is for searching or filtering data todo by input user and this is the advantage of using rxjs, we can use multiple operators to manipulate data.
- We need to subscribe content onClose to listen the event, if true, it will auto-call API get all todolist.
The result is like this.
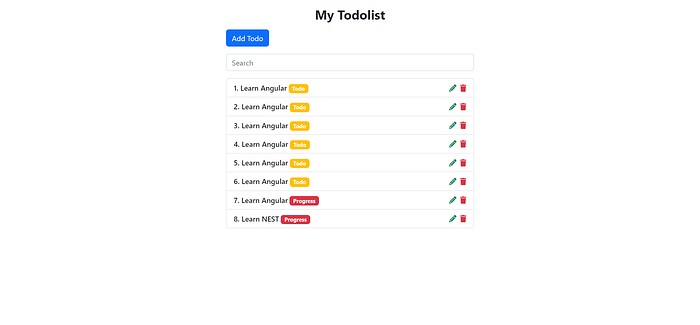
But, we need to add an action like create, detail, update and delete.
For the modal update, create detail, and delete, we will generate a component and separate it from the parent component.
ng generate component todolist/todolist/form-todolist
ng generate component todolist/todolist/delete-todolist
ng generate component todolist/todolist/detail-todolist
Before that, we will add ngx-toastr to real-time response when any action like delete, create, or update.
npm i ngx-toastr
npm i @angular/animations --save
Then, update app.module.ts
import { NgModule } from '@angular/core';
import { BrowserModule } from '@angular/platform-browser';
import { HttpClientModule } from '@angular/common/http';
import { AppRoutingModule } from './app-routing.module';
import { AppComponent } from './app.component';
import { TodolistModule } from './todolist/todolist.module';
import { FormsModule, ReactiveFormsModule } from '@angular/forms';
import { ModalModule } from 'ngx-bootstrap/modal';
import { ToastrModule } from 'ngx-toastr';
import { BrowserAnimationsModule } from '@angular/platform-browser/animations';


@NgModule({
  declarations: [
    AppComponent
  ],
  imports: [
    BrowserModule,
    AppRoutingModule,
    HttpClientModule,
    FormsModule,
    ReactiveFormsModule,
    BrowserAnimationsModule,
    TodolistModule,
    ModalModule.forRoot(),
    ToastrModule.forRoot({
      timeOut: 2000,
      positionClass: 'toast-bottom-right',
      preventDuplicates: true,
    }),
  ],
  providers: [],
  bootstrap: [AppComponent]
})
export class AppModule { }- ToastrModule has default timeOut 2s, position at the bottom right and prevents duplicate toastr.
Also in angular.json add these styles.
            "styles": [
              "src/styles.scss",
              "node_modules/bootstrap/dist/css/bootstrap.min.css",
              "node_modules/ngx-toastr/toastr.css"
            ],
Let’s update the component delete modal. Open file delete-modal.component.ts
import { HttpErrorResponse } from '@angular/common/http';
import { Component } from '@angular/core';
import { BsModalRef, BsModalService } from 'ngx-bootstrap/modal';
import { ToastrService } from 'ngx-toastr';
import { Observable, Subject } from 'rxjs';
import { ITodolist } from '../../interface/todolist';
import { TodolistService } from '../../service/todolist.service';

@Component({
  selector: 'app-delete-todolist',
  templateUrl: './delete-todolist.component.html',
  styleUrls: ['./delete-todolist.component.scss']
})
export class DeleteTodolistComponent {
  public data!: ITodolist;
  public onClose: Subject<boolean> = new Subject();
  constructor(
    private bsModalService: BsModalService,
    private todolistService: TodolistService,
    private toastrService: ToastrService
  ) {
  }

  closeModal(): void {
    this.bsModalService.hide();
  }

  deleteData(): void {
    let id = -1;
    if (this.data) {
      id = this.data.id
    }
    this.todolistService.deleteTodolist(id).subscribe(response => {
      this.toastrService.success('Success', 'Success Delete!');
      this.onClose.next(true);
      this.closeModal();
    }, (err: HttpErrorResponse) => {
      this.toastrService.success('Failed', 'Failed Delete!');
      throw new Error(err.error);
    });
  }
}- After submit button to delete data, we need to mention on the child component that the component was closed and the value is true with the subject.
Then, open file delete-modal.component.html
<div class="modal-header">
<h4 class="modal-title pull-left">Delete Todo</h4>
<button type="button" class="btn-close close pull-right" aria-label="Close" (click)="closeModal()">
<span aria-hidden="true" class="visually-hidden" (click)="closeModal()">×</span>
</button>
</div>
<div class="modal-body">
Are you sure want to delete this todo with the title {{data.title}}?
</div>
<div class="modal-footer">
<button type="button" (click)="closeModal()" class="btn btn-secondary w-25">
Back
</button>
<button type="button" (click)="deleteData()" class="btn btn-danger w-25">Yes</button>
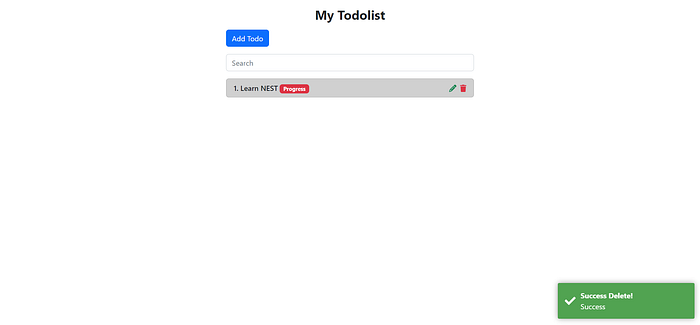
</div>The preview to use feature delete is like this.
Next, update component detail-toodlist.component.html
<div class="modal-header">
<h4 class="modal-title pull-left">Detail Todo</h4>
<button type="button" class="btn-close close pull-right" aria-label="Close" (click)="closeModal()">
<span aria-hidden="true" class="visually-hidden" (click)="closeModal()">×</span>
</button>
</div>
<div class="modal-body">
<table class="table table-borderless">
<tr>
<td>Title</td>
<td>:</td>
<td>{{data.title}}</td>
</tr>
<tr>
<td>Description</td>
<td>:</td>
<td>{{data.description}}</td>
</tr>
<tr>
<td>Status</td>
<td>:</td>
<td>
<ng-container [ngSwitch]="data.status">
<span *ngSwitchCase="'progress'" class="badge bg-danger">Progress</span>
<span *ngSwitchCase="'completed'" class="badge bg-primary">Completed</span>
<span *ngSwitchDefault class="badge bg-warning">Todo</span>
</ng-container>
</td>
</tr>
<tr>
<td>Due Date</td>
<td>:</td>
<td>{{dueDate}}</td>
</tr>
</table>
</div>
<div class="modal-footer">
<button type="button" (click)="closeModal()" class="btn btn-secondary w-25">
Back
</button>
</div>Then, update detail-todolist.component.ts
import { Component, OnInit } from '@angular/core';
import { BsModalService } from 'ngx-bootstrap/modal';
import { ITodolist } from '../../interface/todolist';

@Component({
  selector: 'app-detail-todolist',
  templateUrl: './detail-todolist.component.html',
  styleUrls: ['./detail-todolist.component.scss']
})
export class DetailTodolistComponent implements OnInit{
  public data!: ITodolist;
  public dueDate!: string;
  constructor(private bsModalService: BsModalService) {

  }

  ngOnInit(): void {
    this.dueDate = new Date(Number(this.data.due_date)).toLocaleDateString();
  }

  closeModal(): void {
    this.bsModalService.hide();
  }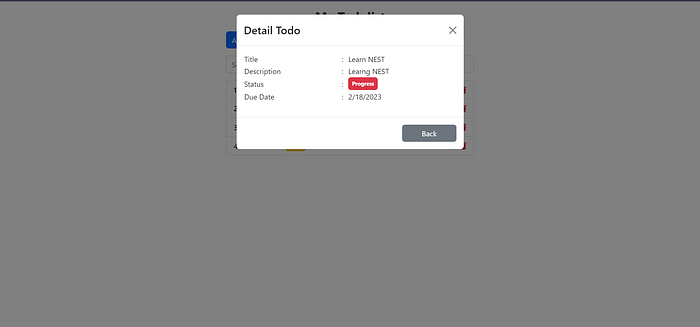
}- We need to convert the number of the due date to readable date time.
The preview detail todolist is like this
Next, in the component form-todolist. This component is used for creating and updating todolist.
Open file form-todolist.component.html
<div class="modal-header">
<h4 class="modal-title pull-left">{{title}}</h4>
<button type="button" class="btn-close close pull-right" aria-label="Close" (click)="closeModal()">
<span aria-hidden="true" class="visually-hidden">×</span>
</button>
</div>
<div class="modal-body">
<form [formGroup]="formTodolist">
<div class="mb-3">
<label for="title" class="form-label">Title</label>
<input type="text" class="form-control" id="title" placeholder="Learning something new" formControlName="title">
</div>
<div class="mb-3">
<label for="description" class="form-label">Description</label>
<textarea class="form-control" id="description" rows="3" formControlName="description"></textarea>
</div>
<div class="mb-3">
<select class="form-select" aria-label="Default select example" formControlName="status">
<option selected>Open this select menu</option>
<option value="todo">Todo</option>
<option value="progress">Progress</option>
<option value="completed">Completed</option>
</select>
</div>
<div class="mb-3">
<label for="due_date" class="form-label">Due Date</label>
<input type="date" class="form-control" id="due_date" formControlName="due_date">
</div>
</form>
</div>
<div class="modal-footer">
<button type="button" (click)="closeModal()" class="btn btn-secondary w-25">
Back
</button>
<button type="button" (click)="submit()" class="btn btn-danger w-25" [disabled]="formTodolist.invalid">Submit</button>
</div>- The modal form is the simple form with element input text, textarea, select, and date.
Open file form-todolist.component.ts
import { HttpErrorResponse } from '@angular/common/http';
import { Component, OnInit } from '@angular/core';
import { FormControl, FormGroup, Validators } from '@angular/forms';
import { BsModalRef, BsModalService } from 'ngx-bootstrap/modal';
import { ToastrService } from 'ngx-toastr';
import { Subject } from 'rxjs';
import { ITodolist } from '../../interface/todolist';
import { TodolistService } from '../../service/todolist.service';

@Component({
  selector: 'app-form-todolist',
  templateUrl: './form-todolist.component.html',
  styleUrls: ['./form-todolist.component.scss']
})
export class FormTodolistComponent implements OnInit {
  public data?: ITodolist;
  public title!: string;
  public onClose: Subject<boolean> = new Subject();
  formTodolist: FormGroup = new FormGroup({
    title: new FormControl('', [Validators.required]),
    description: new FormControl('', [Validators.required]),
    status: new FormControl('todo', [Validators.required]),
    due_date: new FormControl('', [Validators.required])
  })
  constructor(
    private bsModalService: BsModalService,
    private todolistService: TodolistService,
    private toastrService: ToastrService
  ) {
  }
  ngOnInit(): void {
    if (this.data) {
      this.title = 'Update Todo'
      this.doInitFormUpdate();
    } else {
      this.title = 'Create Todo'
    }
  }

  doInitFormUpdate() {
    this.formTodolist.setValue({
      title: this.data?.title,
      description: this.data?.description,
      status: this.data?.status,
      due_date: this.setDefaultDate(Number(this.data!.due_date))
    })
  }

  setDefaultDate(due_date: number) {
    const date = new Date(due_date)
    const year = date.getFullYear()

    let month: number | string = date.getMonth() + 1
    let day: number | string = date.getDate()

    if (month < 10) month = '0' + month
    if (day < 10) day = '0' + day

    const finalDate = `${year}-${month}-${day}`
    return finalDate;
  }

  doCreate(body: ITodolist) {
    body.due_date = Number(new Date(this.formTodolist.value.due_date).getTime());
    this.todolistService.createTodolist(body).subscribe(response => {
      this.toastrService.success('Success', 'Success Create!');
      this.onClose.next(true);
      this.closeModal();
    }, (err: HttpErrorResponse) => {
      this.toastrService.error('Failed', 'Failed Create!');
      throw new Error(err.error);
    })
  }

  doUpdate(id: number, body: ITodolist) {
    body.due_date = Number(new Date(this.formTodolist.value.due_date).getTime());
    this.todolistService.updateTodolist(id, body).subscribe(response => {
      this.toastrService.success('Success', 'Success Update!');
      this.onClose.next(true);
      this.closeModal();
    }, (err: HttpErrorResponse) => {
      this.toastrService.error('Failed', 'Failed Update!');
      throw new Error(err.error);
    })
  }

  submit() {
    if (this.data) {
      this.doUpdate(this.data!.id, this.formTodolist.value);
    } else {
      this.doCreate(this.formTodolist.value);
    }
  }


  closeModal(): void {
    this.bsModalService.hide();
  }

}- In the form-todolist.component.ts, we combine the function of create and update.
- When the variable data is undefined it means create mode, otherwise, it means update mode
- The function setDefaultDate is to set a default value on the element date.
- doCreate and doUpdate is a function to hit the endpoint by mode form
- The function doInitFormUpdate is to set a value on update mode.
- Function submit() is a function to trigger create or update of data.
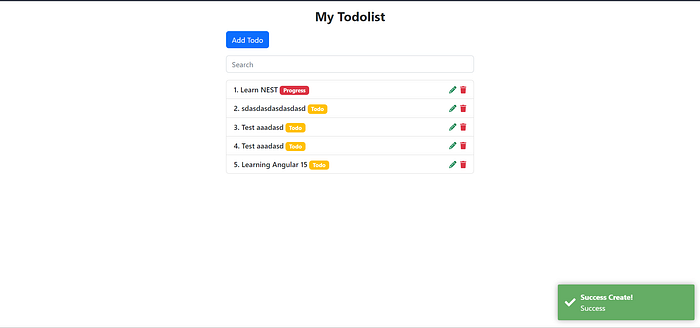
The preview create data is like this

Then, this is the preview update todolist


Finally, we have completed the tutorial, it’s a little too long ya, but it’s okay because we learn a lot in this tutorial. Anyway for this code, I have push on my GitHub repository
References
#Angular #Angular15 #TutorialAngular #ReactiveForm #ConsumeRestApi #RESTAPI